Selecciona tu ubicación
Podemos ver tu ubicación en $country consulta la versión de nuestro sitio para Spain

Otros países están también disponibles
Class Manager has always strived to be the single data store for all your business information, everything is so much easier when it's all in one place! Even better, when that place is available on any device (iPhone/iPad/computer), is really secure and has strict access controls for your staff.
To further extend the data you can keep on Class Manager we have introduced custom attributes.
Adding your tailored information couldn’t be easier using our new custom attributes feature which you can find under settings > custom attributes on Class Manager.
We know with your busy schedules teaching; the last thing you need to do is sift through irrelevant lists to find required data on customer, student, staff, venue or class pages.
You are now able to attach your chosen information to whichever page you choose across the software.
To get you started we've collated a few examples of attributes our customers are already using today.
Keep track of which students you have photo consent for on a student-by-student basis.
Keep track of which customers are happy to receive marketing content from you.
Ensure each staff member has a DBS certificate assigned to them so you can check the status of it any time, perhaps even create another attribute to keep track of the DBS Expiry Date.
Keep track of which local academic school each student attends, provide a pre-populated list of the local schools in the area to ensure it is kept organised.
Not having unnecessary information on your database will stop it from getting messy and confusing, you will have all the information you want to see on your own pages across Class Manager.
To ensure your data is as organised as possible, different types are relevant for each example. Please don't be scared by the choice, the following are available for you to choose from with the relevant examples;
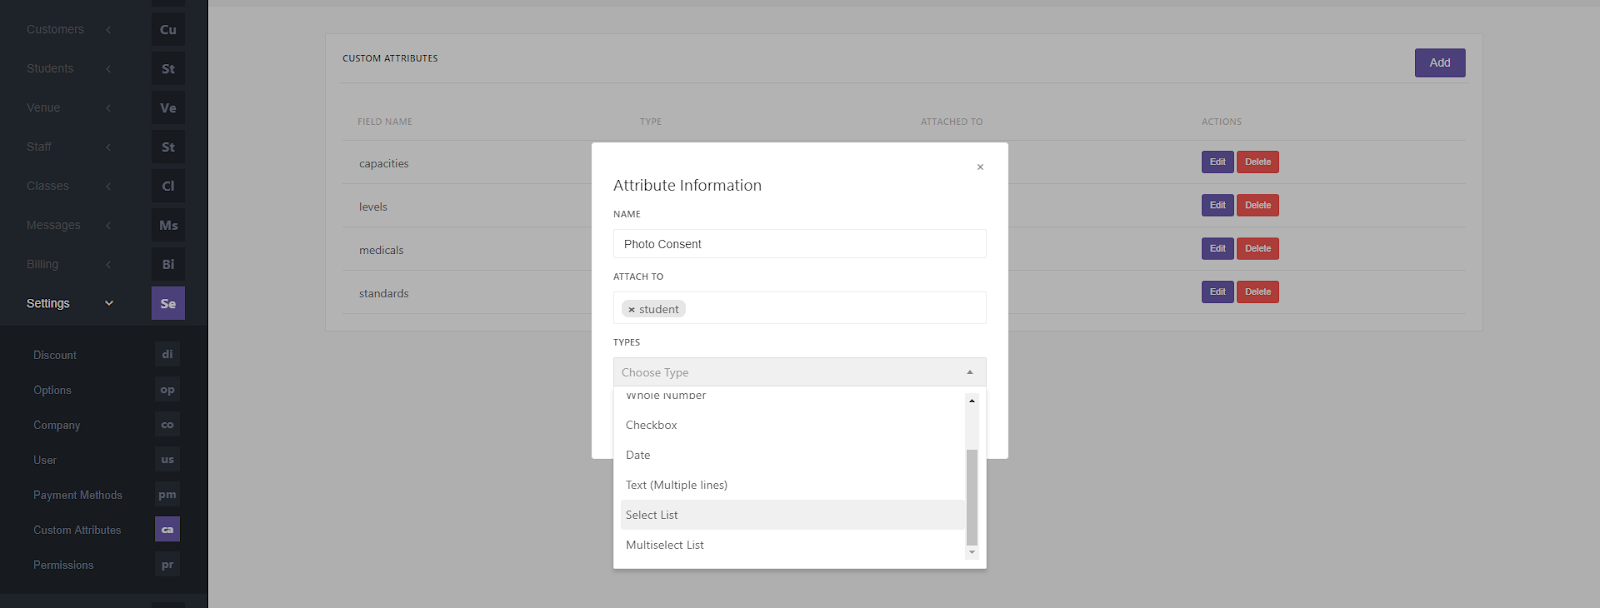
To get started we need to find Custom Attributes section under Settings in the main menu.
After clicking Add simply give your attribute a name, assign it to your chosen data type (customer, staff etc) and choose the way you want to select your data.
Select from the choice of types from the list above, under data types.
In the example we are going to create simple checkbox (Agree/Disagree) to record data for if photo consent has been given against our student records.

After we have created the attribute and assigned it to the data type & student we can head over to see it in action.
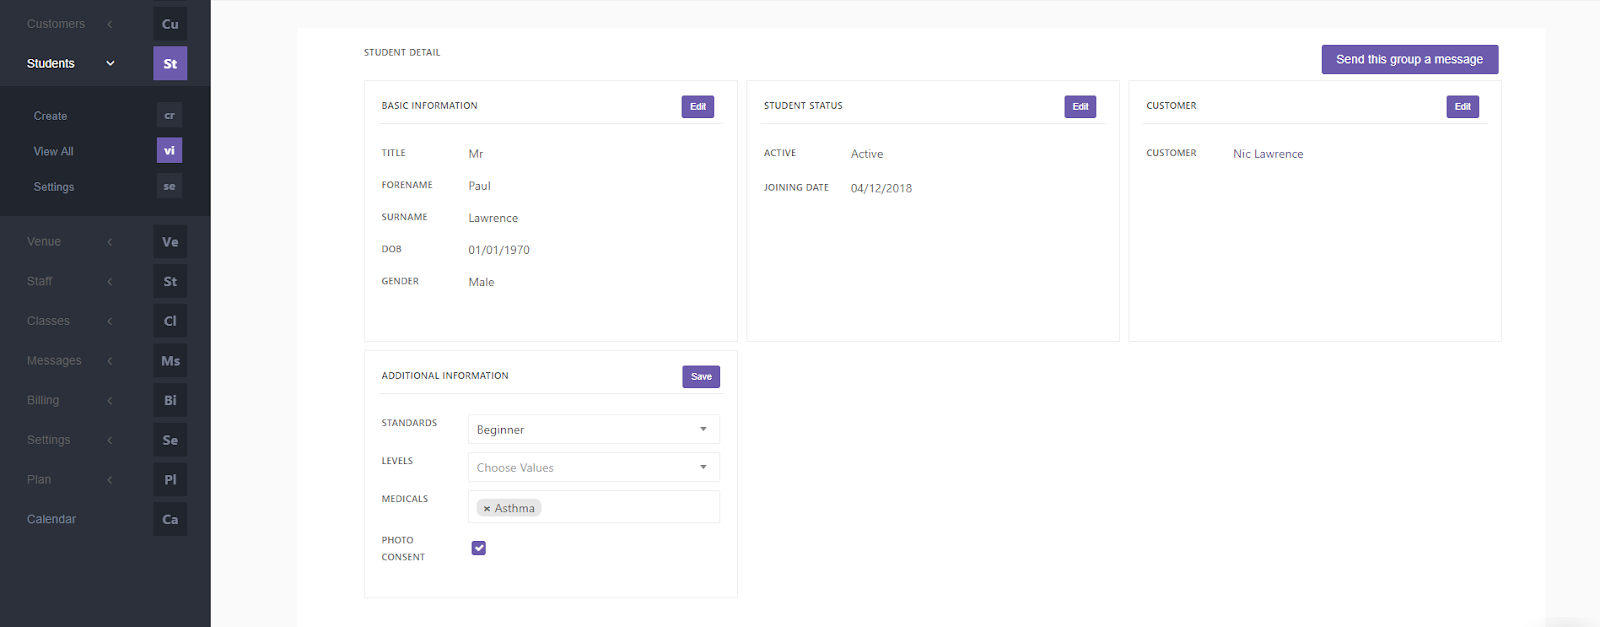
To see the attribute, select any customer and you find photo consent now appears under the additional information section.
Please see an example below of a student page after adding photo consent checkbox:

We want your Class Manager account to be personalised to you so you get the most out of it. Don't be scared to jump in and get started after reading this post, if you are stuck at any time you can always reach out to our team.
Soon we will soon be introducing a full reporting suite to Class Manager, that means that you will be able to use your chosen data to process reports and collate information that is helpful to your business.
For example if you have added a photo consent checkbox onto your student page, you will be able to search quickly for all students that have that ticked, at the click of a button.
Class Manager. Derechos de autor © 2025. Todos los derechos reservados